Check out what we're studying in ART!

Showing posts with label Kindergarten. Show all posts

Thursday, April 19, 2012

Wolf Kahn Chalk Pastel Trees with Kinders!

http://artasticartists.blogspot.com/2011/03/wolf-kahn-analogus-color-family-pastel.html

I have another previous post about this, but it's much easier than you think! I tell my kinders to write their name on the back of a big 12x18 piece of drawing paper at their tables. I count them down to encourage them to focus on getting their name on the back. Raise your hand if you're ready for directions! Everyone's hand is in the air, next step is to pick out 6 colors. Your magic number is 6. Pick out 6 chalk pastel from your container. I'll count ya down, you pick out 6 and have them ready. I start from 15. 15, raise your hand if you have your pastels, 14, have them out and read, 13 pick out your colors, 12, 11, 10......and I continue to count down until all hands are in the air.


I have then on the white board where everyone can see, a piece of 12x18 white paper taped. I have my 6 pastels ready. Okay, pick out your first color and hold it in the air. 5, 4, have it ready, 3, 2, and 1: Watch what I do: (I demonstrate how there's 2 ways of using the chalk pastel. The tip and the side. I tell them we're going to use the side of the pastel for a lot of the project. I show them and count them down from 15. 15, move side to side, 14, side to side, 13 side to side, ........ After we get a new color for each section, it's time for the fun part! Now it's time to smooth side to side, use the tips of your fingers on 1 hand. 15 smooth side to side, 14, smooth side to side, 13, side to side, moving up slowly, smoothing side to side.......now we're going to get ready with a new color and then hold it in the air in 5, 4, 3, 2, and 1. This time using the tip watch to see what I do to make the trunks: *do the downward motion strokes for trunks* Fast! Fast!Fast! Say it out loud! *kids fast, fast, fast* as they make the marks on their paper. Okay done in 5, 4, 3, 2, hold your color in the air. Okay, get your last color and hold it in the air in 5, 4, 3, 2, 1, watch. Using the side *demonstrate* we're going to make the tops of the trees to finish our Wolf Kahn pastel. Watch how I do it to fill the top area. *Demonstrate* Finish up from 15, 14, 13....... put your pastel down and your hand in the air, and the other in the, wave'em around like you just don't care, heeeeey hooooo.( I like to make it fun to listen:) ) I will call tables to wash hands, then dry and the table captain will wash your table and dry. Put your drawing on your chair and point to places where your table captain needs to wash and dry.

Try this with your kinders! It works great! (more pics to come!)

Sunday, April 8, 2012

Jellyfish with Kinders!


So I have been using Pinterest and it's fun to see those of you who enjoy lessons from my blog! I keep seeing my photos popping up when I'm exploring different art lessons! I like to look on Pinterest for inspiration and then figure it out myself or use an idea then make it my own by putting my own twist on it.

Here's how I did the jellyfish: I first showed them my example and talked about jellyfish and it's tentacles.  We also looked at a photo of a jellyfish to understand it's colors. I think I'll show a video clip of different kinds and how they move in the water when we're finishing next time.  There was a lot of prep for this art lesson: cutting tissue paper into small squares enough for alllll my classes, getting the modge podge mixed with water in styrofoam bowls (easy throw away), cutting up of the white strips of paper, wrapping all the styrofoam bowls with Seran wrap/plastic wrap, and cutting all the strips of different colors for the tentacles. 

After you get that done here's the different steps: I have the students go to their seats first, write their name and class code on a sticker. The student peels off the sticker, walks up to the table to get their plastic wrapped bowl, sticks the sticker on the underside of the bowl. I showed students how to 'paint' on the stinky modge podge on one side of the paper, place it on the top of the bowl, paint on the top of the strip, and smooth it down with your hands. Get messy. Keep placing the white strips in a radial design covering the plastic wrap. Make sure to paint modge podge on top and smooth down. Then get around 6 or so different colored squares of tissue paper. Lay on top of the white strips and paint Modge Podge to seal and smooth down.

When it's dry, pull plastic wrap carefully away from jellyfish. Throw away plastic wrap. Keep bowls for another use. Poke two holes in the top for fishing wire/string to hang. Attach tentacles with dots of Elmer's glue to the underside. Crumple the tentacles for added texture.


Centers with Kinders: "Seen Art?" creating a personal masterpiece!


I decided to try out this center based learning. For art I felt it was an exploratory station based art lesson. Centers are said to provide individual/independent based learning where students use their own problem solving skills to acheive high levels of Bloom's Taxonomy. For kinders, I read the book "Seen Art?" which is a book all about a boy who's trying to find his friend named "Art" and wonders upon the MoMA (Museum of Modern Art) in New York City. He keeps trying to tell the people from the museum that he's looking for "Art" and they think he's talking about art in the art museum, not his friend! The illustrations (by the famous Jon Scieszka) incorporate real photos of all kinds of famous masterpiece art works from famous sculpture, to famous paintings, prints and even examples of famous historical artistic film.


For our art lesson, I told kinders to design a masterpiece of their own exploring different types of materials. How are you going to use these materials? I made copies of a "masterpiece" frame I drew and then at the top I typed "We read the book "Seen Art?" by Jon Scieszka and Lane Smith. We looked at famous masterpieces from the MoMA (Museum of Modern Art). We then went to different stations/centers to create our masterpiece." I designed different 'centers' stations that had different and unique types of materials. It was up to the student to decide how they wanted to use this material and how to incorporate it into their masterpiece.


Yes this student did his work upside down but he came up with the concept
of making his own "Starry Night" using these materials!


perhaps a self portrait
 Here are the different types of 'centers' I did. Markers and color changing markers, liquid watercolor in spray/spritz bottles, crazy cut scissors with scrap construction/painted paper and glue, scissors with tissue paper box with glue, crayons/glitter crayons, and colored pencils/metallic colored pencils. I instructed students to use whatever they wanted however they wanted to create their masterpiece. Listen for the timer, 3 minutes at each center and follow the numbers of tables. We rotated from station to station and when we were done we kept them out and looked at everyone's.

Tuesday, March 20, 2012

We scream for Ice cream (and Cupcakes!) with Wayne Thiebaud!


I can't believe it, but I forgot to post about my one of my favorite art lessons from last year where we did the cakes! I'll get to that later...let's stick to this year. We just finished making Wayne Thiebaud "3 Ice Cream Cones" themed art in our own style and "3 Cupcakes". I showed students this clip of Wayne Thiebaud talking about his art. http://www.youtube.com/watch?v=vI_QJ5D9Qm8


For the ice cream waffle cones, we traced a triangle on brown paper 3 times. Then took a brown crayon to make "X's" for the ridges in the waffle cone. Cut out and glue the first cone's point touching the middle bottom. If you do that than you helped manage the even spacing for the other cones! Glue the other 2 on.


Now it's time to start using up those painted paper scraps! What flavor can you make? Start tearing small pieces to make a torn paper collage. Single scoop? Double scoop? Different flavors? Add detail with cutting small sprinkles and garnish with different fruits or toppings!


We're going to spread some glue on the tops if students want, and then add some sprinkles!


CUPCAKES with FAKE FROSTING!:) 


For the cupcakes, I premixed silver paint/water mixture and painted a bunch of gray pieces of paper, dried them, and cut them up for individual "cups" for the cupcake. I showed students outline with black crayon and how trim the paper.  Cut out and glue all 3 cups on your long 12x18 paper. At each table I had a different pre-mixed joint compound mixed with paint. We used popsicle sticks as spreaders. I got this amazing concept from http://elementaryartroom.blogspot.com/2011/01/wayne-thiebaud-creations.html . Then it's time to add some sprinkles before letting them dry. Add sequins for added dimension or 'candy pieces'.


Tuesday, March 6, 2012

Painted Paper Flower Color Wheels! Eric Carle's "The Tiny Seed"


Kinders are learning about color and how the color wheel works. We started this project by first listening to Miss Oetken read Eric Carle's "The Tiny Seed" aloud. We also learned about the life cycle of a seed and the journey it goes on growing into a plat/flower. We noticed the cover had a large painted paper flower on it for the illustration. I reminded students that this is same artist/illustrator as "The Very Hungry Caterpillar".  For our first session (this is a 2 or 3 part assignment) of 30 minutes I read the book "The Tiny Seed" and then each table was in charge of just one color and each person (4) painted paper with that color paint (12x18 pieces of paper). I informed the students we would be sharing these as a class and I would be cutting them up, so no words or names please! I was in charge of "indigo" for the rainbow. I showed students how to texturize their choice of painted paper. They could make line designs or pattern, they could use a comb through it, they could paint it solid, or they could paint it solid and then draw into it using the end of the handle of their brush. Then dry on the drying rack.


2nd classtime: Before they came the next time, I had cut all the paper for their class into 3x6 pieces to cut petals out of. I sorted them by color into  cool whip containers or whatever containers available. I started class by having a color wheel out and explained the color wheel is a guide for us to understand how color works, how colors are mixed and what you get when you mix colors together, and why is there a gray circle in the middle? That's why we'll have a gray center of our flower!  I showed students how to draw with a pencil a petal on the WHITE SIDE preserving the nice painted side. I also demonstrated how the petals need to all touch and go on top of one another around in a circle (radial design). This can be tough for some students at this age. So demonstrating with precut petals and showing how they all need to touch in the middle works OR simply draw a small circle so that the students have something to 'touch' the ends of the petal to. It gives them a guide.

 I mentioned that you should only take one petal at a time to cut and then glue, and then you're ready for another one to be completed and so on. This worked better for my students. Sometimes if you don't mention this, you'll end up with a student with all his/her work cut out and NONE of it glued, and then it's lost, and then next time they have to start over! SO this is a good rule of thumb. Most of my students only got as far as getting all the petals cut out.


3rd session: This is our finishing day! I showed and reviewed the color order to double check with students that they had the correct order of the rainbow and we talked about ROY-G-BIV and explained that. I had 4 stations. Gray paper square station, grass stations (forks with green paint), and butterfly station. We have yogurt cups and I said to trace the bottom of it on the gray paper to get a perfect circle for the flower center and glue on. Next green painted paper scraps for the stem and leaf. Next station, butterflies. I just cut pieces of left over tissue paper into about 3 inch squares and showed the students to twist in the center and apply large glue dot to paper and attach.  Draw antennae with pencil. Last step, grass station where the students used green paint with forks and rock back and forth to achieve the green grass on the bottom of the paper. Drying rack then take home next time.


Thursday, January 19, 2012

"I MUSTACHE you a question...Will you be my Valentine?"


 Kindergarten is going to be making Mustache Valentines! All I did was make some mustache tracers to trace onto brown paper pieces with white crayon so they can see and cut.  They can pick one glittery heart to glue on somewhere. I wrote their names on popcicle sticks then had out a bunch of masking tape pieces around my table. Tape the stick to the side. I made copies of the saying "I MUSTACHE you a question...WIll you be my Valentine?" Gluing the saying on is the last step! Easy and fun and sure to get some laughs.


Thursday, December 22, 2011

12 Dogs of Christmas with Kinders-decorate a dog!


Kinders loved the book "The 12 Dogs of Christmas". I basically sang it to them. It follows the song except changes the words so they correspond with different breeds of dogs doing funny things. For example, "On the 10th day of Christmas my true love gave to me, 10 dalmations dancing..." and has these hilarious photos of dogs doing funny things and then the artist 'drew' clothes on top of the photo. We decided to do the same! Except I printed off regular photos of dogs, then suggested funny things to add with crayon and oil pastel. A scarf? A sled? A santa beard? Ice skates? Mitten on the paws? Tutus? Ballet shoes? Hat? Candy cane? The students laughed and laughed with the story and the project. A great project to end before the big winter break!


Monday, December 12, 2011

Kinders get in the spirit of the season!


Students got into the spirit of the season with making a traced hand that turns into a deer (or reindeer if they prefer!) along with a winter tree (that they could decorate by choice) on a snowy night! First students traced their hand on a piece of brown construction paper with a white crayon so they could see what to cut out.  Glued down so the 'fingers/legs' are touching the ground. Then cut out 3 small triangles (students can draw them with a pencil if easier) out of the brown scrap before discarding. 2 for the ears and 1 for the tail.


Then add details with crayon. Black crayon for the hooves, black crayon for the eyes, black for the nose if it's a deer in the winter forest, and red if you want to make it Rudolph. Brown crayon for the antlers. Then get a small piece of green paper-draw a large triangle on it for a tree. Glue next to deer. Decorate with snow or holiday trimmings. Use white crayon to make snow or snowflakes falling from the sky. I also showed students how to make the snowy ground by making a wavy horizon line with white crayon.


When students were finished I showed them how to make a polar bear by doing the same thing, except a few changes. White paper, black crayon, adding 2 back circles, and claws. I also showed students how to draw an igloo.


Wednesday, December 7, 2011

Kindergarten & 1st grade Winter Wonderland Mural with guest art teacher Stephanie Lase!


Miss Lace, an area art teacher and art education friend from college days at UNI (oh how I miss our painting classes together!) observed our classroom (more like helped the entire day!) and created the background for our amazing Winter Wonderland mural! Kinders helped make and decorate trees, 1st grade made hand polar bears and detailed penguins! We used painted paper scraps for the details on the penguins. We did this as a bonus activity after we finished our cat and dog pattern sweaters.


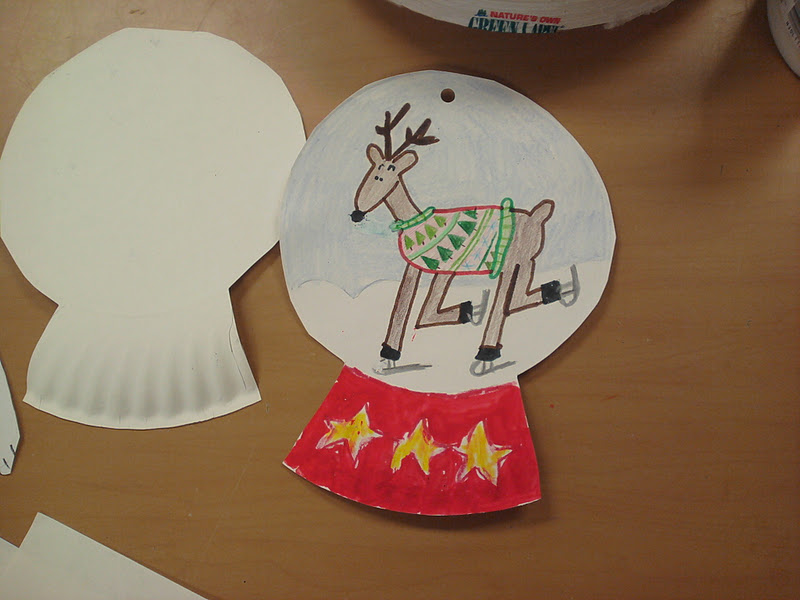
When students were finished they could also do some other winter fun theme activities! Like a snowglobe made out of the center of a plate! Turn it into an ornament?


....or make a stamper patterned wrapped gift? Then glue on a strip of yarn for a bow around the gift.