 |
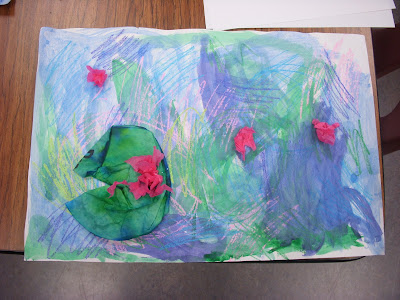
| Voila! A student's Monet Waterlilies with a 3-D touch! |
4th just finished up with Impressionism and ending where we started....with Monet! We first looked a very beautiful poster, given to me by the one and only amazing Becky Brandt, and other visuals of Monet's studies of various waterlilies floating on the water. We looked at the different colors in the water and reflections we saw. Students pointed out pinks, blues, greens, yellow greens, lavenders, magentas, purples and more. The result looks complex but the process was fairly simple!
Students first took a 12x18 heavy weight sulphite piece of a paper and used crayons to make scribbles using the colors we discovered in the reflections in the water (note above colors listed). Then using a green, making 3 green ovals for lily pads. Then after crayon, students used blue, green, purple and a little bit of pink watercolor in areas and blended them. I explained to "keep it light to keep it right" "lots of water little bit of paint" to really get those nice blends. Of course I demo-ed everything at the beginning of class so students knew how to go about these processes.
 |
| Miss Oetken's Monet:) |
 |
check out another students beautiful way of adding lots of
pink tissue to make a giant lily on the lily pad! |
Before they left, I said to count to 10 and scribble with green and blue (if they wanted they could add a little purple) Crayola marker and write their name in permanent marker with their class on a.....COFFEE FILTER! Yes! Then I put them all in the drying rack and sprayed em down to get that beautiful, blended, watercolor look.
 |
student using their pencil to wrap a small piece of pink tissue around for the lily. Then while holding the tissue wrapped around the pencil, the student adds glue to the end and attatches it to the paper and twists, lifts up leaving a lily
|
For classtime 2 students took their big tye dyed coffee filter, folded it in have, then made a cone or 'teepee' shape, then smashed it down (you don't have to do it this way I explained if they had another idea) and glued it down on the page where they wanted. Then take some pink small pieces of tissue paper for the lilies. We wrapped them around a pencil eraser end, then added a dot of glue on the paper where it would stick, pressed the tissue wrapped end of pencil to the glue, twisted while pressing, and lift up! Instant blossom! Add more to one area if you want to make a more bountiful blossom waterlily.
 |
| student work |
Add pink tissue paper lilies to your green crayon lily pads to give it a finishing touch! Tah Dah! Check out how beautiful these turned out! Check below:)
 |
My wonderful tissue paper tear-ers! Woo go team!
|


