Check out what we're studying in ART!

Showing posts with label painted paper. Show all posts

Tuesday, March 20, 2012

We scream for Ice cream (and Cupcakes!) with Wayne Thiebaud!


I can't believe it, but I forgot to post about my one of my favorite art lessons from last year where we did the cakes! I'll get to that later...let's stick to this year. We just finished making Wayne Thiebaud "3 Ice Cream Cones" themed art in our own style and "3 Cupcakes". I showed students this clip of Wayne Thiebaud talking about his art. http://www.youtube.com/watch?v=vI_QJ5D9Qm8


For the ice cream waffle cones, we traced a triangle on brown paper 3 times. Then took a brown crayon to make "X's" for the ridges in the waffle cone. Cut out and glue the first cone's point touching the middle bottom. If you do that than you helped manage the even spacing for the other cones! Glue the other 2 on.


Now it's time to start using up those painted paper scraps! What flavor can you make? Start tearing small pieces to make a torn paper collage. Single scoop? Double scoop? Different flavors? Add detail with cutting small sprinkles and garnish with different fruits or toppings!


We're going to spread some glue on the tops if students want, and then add some sprinkles!


CUPCAKES with FAKE FROSTING!:) 


For the cupcakes, I premixed silver paint/water mixture and painted a bunch of gray pieces of paper, dried them, and cut them up for individual "cups" for the cupcake. I showed students outline with black crayon and how trim the paper.  Cut out and glue all 3 cups on your long 12x18 paper. At each table I had a different pre-mixed joint compound mixed with paint. We used popsicle sticks as spreaders. I got this amazing concept from http://elementaryartroom.blogspot.com/2011/01/wayne-thiebaud-creations.html . Then it's time to add some sprinkles before letting them dry. Add sequins for added dimension or 'candy pieces'.


Tuesday, March 6, 2012

Painted Paper Flower Color Wheels! Eric Carle's "The Tiny Seed"


Kinders are learning about color and how the color wheel works. We started this project by first listening to Miss Oetken read Eric Carle's "The Tiny Seed" aloud. We also learned about the life cycle of a seed and the journey it goes on growing into a plat/flower. We noticed the cover had a large painted paper flower on it for the illustration. I reminded students that this is same artist/illustrator as "The Very Hungry Caterpillar".  For our first session (this is a 2 or 3 part assignment) of 30 minutes I read the book "The Tiny Seed" and then each table was in charge of just one color and each person (4) painted paper with that color paint (12x18 pieces of paper). I informed the students we would be sharing these as a class and I would be cutting them up, so no words or names please! I was in charge of "indigo" for the rainbow. I showed students how to texturize their choice of painted paper. They could make line designs or pattern, they could use a comb through it, they could paint it solid, or they could paint it solid and then draw into it using the end of the handle of their brush. Then dry on the drying rack.


2nd classtime: Before they came the next time, I had cut all the paper for their class into 3x6 pieces to cut petals out of. I sorted them by color into  cool whip containers or whatever containers available. I started class by having a color wheel out and explained the color wheel is a guide for us to understand how color works, how colors are mixed and what you get when you mix colors together, and why is there a gray circle in the middle? That's why we'll have a gray center of our flower!  I showed students how to draw with a pencil a petal on the WHITE SIDE preserving the nice painted side. I also demonstrated how the petals need to all touch and go on top of one another around in a circle (radial design). This can be tough for some students at this age. So demonstrating with precut petals and showing how they all need to touch in the middle works OR simply draw a small circle so that the students have something to 'touch' the ends of the petal to. It gives them a guide.

 I mentioned that you should only take one petal at a time to cut and then glue, and then you're ready for another one to be completed and so on. This worked better for my students. Sometimes if you don't mention this, you'll end up with a student with all his/her work cut out and NONE of it glued, and then it's lost, and then next time they have to start over! SO this is a good rule of thumb. Most of my students only got as far as getting all the petals cut out.


3rd session: This is our finishing day! I showed and reviewed the color order to double check with students that they had the correct order of the rainbow and we talked about ROY-G-BIV and explained that. I had 4 stations. Gray paper square station, grass stations (forks with green paint), and butterfly station. We have yogurt cups and I said to trace the bottom of it on the gray paper to get a perfect circle for the flower center and glue on. Next green painted paper scraps for the stem and leaf. Next station, butterflies. I just cut pieces of left over tissue paper into about 3 inch squares and showed the students to twist in the center and apply large glue dot to paper and attach.  Draw antennae with pencil. Last step, grass station where the students used green paint with forks and rock back and forth to achieve the green grass on the bottom of the paper. Drying rack then take home next time.


Sunday, November 6, 2011

Painted Paper Owls


1st graders made painted papers and then turned them into these awesome fall owls! I had paint containers with tempera paint with the colors, yellow, orange and brown. I had 2 yogurt cups with 2 pencils in each (so each table had 4 pencils total).

 First step was writing their name and class in the middle on the back of 2 sheets of 12x9 white thicker drawing paper(so when they cut stuff out their name is already on it!). I had students paint both papers with paint in order of my direction. Students had 2 minutes per color. First we stuck out paint brush in yellow to paint....5...4....3....2...1.. hold your paint brush up! Next color is....ORANGE, GO! Then another 2 minutes and so on. I explained it's okay to have the same paint brush in the colors as long as you go in my color order because it won't mess up the paint color! Then students put down their brush.


Then students brought papers to the drying rack and then rinsed brushes, cleaned tables and hands!
The next time when their two painted papers were dry we followed these steps. Pick one of the papers for the body. Cut the bottom two corners off. On your other sheet of paper cut out 2 triangles for the ears. Glue ears on top of body. I had brown rectangles of paper for the 'tummy' (5x7) and had triangle tracers to set on top and cut out. Glue on brown tummy. To trace eyes, just dump out the pencils from the yogurt containers and trace the yogurt containers onto slips of white paper for the eyes! Cut out and glue on. Use a black marker for the pupil of the eyes. For the feet, cut yellow construction paper rectangles (2x 5). I showed students how to draw a zigzag and cut out the triangles for the feet and beak. Glue on! Done!


Tuesday, October 18, 2011

Folk Art Spanish Guitars

First grade learned about Spanish culture through Folk Art and music working together! Music and art are a vivid part of Spanish Culture! We made our own bright colored painted paper and turned them into a variety of Spanish Guitars! 1st graders also looked at some brightly painted folk art guitars for inspiration. I got this wonderful lesson from another blog, "There's a Dragon in my Art Room". It inspired me to do this wonderful art lesson about Spanish culture!

Miss Oetken's Spanish Folk Art Guitar

First students made texture and painted paper to mimic the painted Folk Art guitars. We used 2 sheets of heavy 12x18 white drawing paper and put our NAME IN THE MIDDLE ON BACKwith our class number ON BOTH. SO important management wise to get it in the middle (for cutting out later, the name would disappear and get cut off!) For painted paper I have all different colors of paint: A different color at each table with a a texture roller and a texture stamper. 
a student applying paint with a paintbrush to the roller texture tool
Students get to pick 2 different colors. 1 color for the base color (coat the entire piece of paper) and then a different one for the texture roller/ or stamper on top. I also gave the option of putting a color completely on top and then using a comb to comb through it so the other color shows through underneath ("Brush your paint's hair"). We talked about how to apply paint with a paintbrush to the foam texture roller fast and also apply fast paint to the texture tool. The reason for that is if you don't, students either want to dunk it in the paint and then smoosh it all over their paper-that defeats the purpose of the texture it rolls on the paper. I also talk about barely applying pressure with the foam texture roller when rolling it across paper. I tell students the tools stay at the station...the stations "stays".  When I have paint stations I have students push in their chair to encourage standing around stations so they can easily find a free brush.

texture stamping on top with a new color

look how cool the comb texture effect is! Pink was the base color, then tourqoise on top,
then combed through when wet


yellow and tourquoise on top combed through


yellow and yellow-orange dot texture with roller

The next art class when both papers are dry, we looked at and talked about the different parts of a Spanish accoustic guitar: The headstock (the end where the tuning pegs are), the neck (the long part), the body (the big, main part of the guitar), the soundhole, the bridge, tuning keys, strings, and pegs. I drew a diagram on the board labeling the parts, and then the steps of the project.


Turn both papers over so the name side/white side is up. Decide which piece is going to be the for the body, and which piece is going to be for the neck, headstock, and bridge is going to be on. 


On one of the pieces, draw a LARGE rectangle for the headstock, a small rectangle for the bridge, circle for sound hole, and a long line along the edge for the neck. 


On the other piece on the white side up, I told students to make a large oval on the bottom stretching to all the sides. Then draw another smaller egg sitting on top. Now that both are drawn it's time to cut out! Warn students not to cut through the middle of the body by accident! Oopsies-there's always tape:)


the name and class stay in the middle when you cut out:)


Now it's time to glue and assemble, once everything is cut out! The headstock creates a "t" at the top of the neck. I also encouraged students to bring up scraps to put in a box incase they wanted to pick another color for the bridge...just to create some contrast and color!

large buttons for the ''tuning keys/pegs"


For the strings, I talked about how to measure the yarn. It's always smart to stretch the yarn to measure and cut it too long. You can always trim it later. Then with the piece that was measured correctly, hold it up to the other pieces of yarn, and cut 3 other pieces the same length. We also talked about making a "swimming pool" for your yarn to lay in. I showed how to make 4 small 'pools' on the headstock where the strings will lay in. Also 1 'fret' of glue in the middle of the neck (a line of glue) to help secure the strings. That way, the glue will dry around solid keeping the yarn intact. Then bring the other end to the bridge to a glue pool on that end. While still wet, glue down buttons for the tuning pegs on the headstock. Sequins for the pegs "holding the strings in place".
Then for final touches, add a couple buttons for detail and decorate with paper, sequins,and more!

Look at my students amazing guitars! We are so going to have to play some spanish guitar music to strum to once they're finished!


.....and some students who have finished!...............


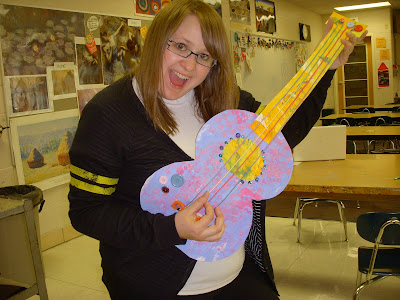
Miss Oetken likes to rock out too!