Check out what we're studying in ART!

Showing posts with label Children's Book Art. Show all posts

Sunday, April 8, 2012

Centers with Kinders: "Seen Art?" creating a personal masterpiece!


I decided to try out this center based learning. For art I felt it was an exploratory station based art lesson. Centers are said to provide individual/independent based learning where students use their own problem solving skills to acheive high levels of Bloom's Taxonomy. For kinders, I read the book "Seen Art?" which is a book all about a boy who's trying to find his friend named "Art" and wonders upon the MoMA (Museum of Modern Art) in New York City. He keeps trying to tell the people from the museum that he's looking for "Art" and they think he's talking about art in the art museum, not his friend! The illustrations (by the famous Jon Scieszka) incorporate real photos of all kinds of famous masterpiece art works from famous sculpture, to famous paintings, prints and even examples of famous historical artistic film.


For our art lesson, I told kinders to design a masterpiece of their own exploring different types of materials. How are you going to use these materials? I made copies of a "masterpiece" frame I drew and then at the top I typed "We read the book "Seen Art?" by Jon Scieszka and Lane Smith. We looked at famous masterpieces from the MoMA (Museum of Modern Art). We then went to different stations/centers to create our masterpiece." I designed different 'centers' stations that had different and unique types of materials. It was up to the student to decide how they wanted to use this material and how to incorporate it into their masterpiece.


Yes this student did his work upside down but he came up with the concept
of making his own "Starry Night" using these materials!


perhaps a self portrait
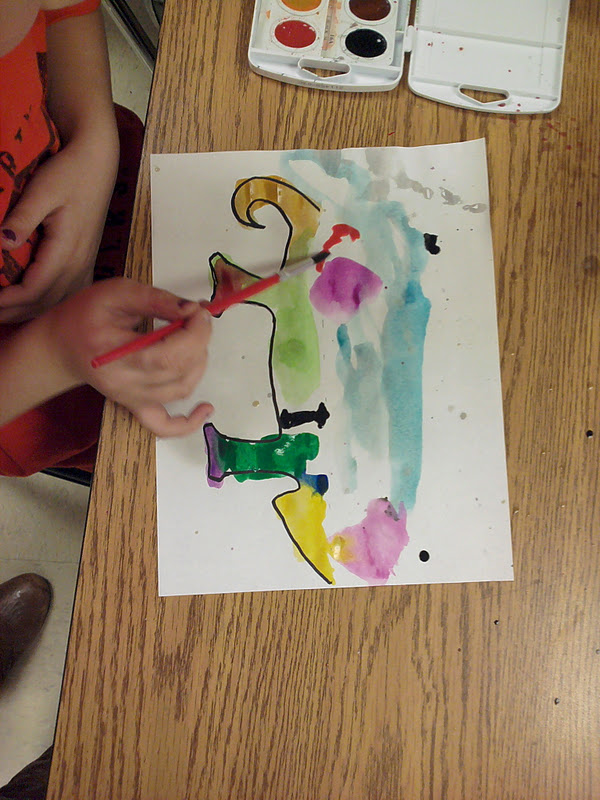
 Here are the different types of 'centers' I did. Markers and color changing markers, liquid watercolor in spray/spritz bottles, crazy cut scissors with scrap construction/painted paper and glue, scissors with tissue paper box with glue, crayons/glitter crayons, and colored pencils/metallic colored pencils. I instructed students to use whatever they wanted however they wanted to create their masterpiece. Listen for the timer, 3 minutes at each center and follow the numbers of tables. We rotated from station to station and when we were done we kept them out and looked at everyone's.

Tuesday, March 6, 2012

Painted Paper Flower Color Wheels! Eric Carle's "The Tiny Seed"


Kinders are learning about color and how the color wheel works. We started this project by first listening to Miss Oetken read Eric Carle's "The Tiny Seed" aloud. We also learned about the life cycle of a seed and the journey it goes on growing into a plat/flower. We noticed the cover had a large painted paper flower on it for the illustration. I reminded students that this is same artist/illustrator as "The Very Hungry Caterpillar".  For our first session (this is a 2 or 3 part assignment) of 30 minutes I read the book "The Tiny Seed" and then each table was in charge of just one color and each person (4) painted paper with that color paint (12x18 pieces of paper). I informed the students we would be sharing these as a class and I would be cutting them up, so no words or names please! I was in charge of "indigo" for the rainbow. I showed students how to texturize their choice of painted paper. They could make line designs or pattern, they could use a comb through it, they could paint it solid, or they could paint it solid and then draw into it using the end of the handle of their brush. Then dry on the drying rack.


2nd classtime: Before they came the next time, I had cut all the paper for their class into 3x6 pieces to cut petals out of. I sorted them by color into  cool whip containers or whatever containers available. I started class by having a color wheel out and explained the color wheel is a guide for us to understand how color works, how colors are mixed and what you get when you mix colors together, and why is there a gray circle in the middle? That's why we'll have a gray center of our flower!  I showed students how to draw with a pencil a petal on the WHITE SIDE preserving the nice painted side. I also demonstrated how the petals need to all touch and go on top of one another around in a circle (radial design). This can be tough for some students at this age. So demonstrating with precut petals and showing how they all need to touch in the middle works OR simply draw a small circle so that the students have something to 'touch' the ends of the petal to. It gives them a guide.

 I mentioned that you should only take one petal at a time to cut and then glue, and then you're ready for another one to be completed and so on. This worked better for my students. Sometimes if you don't mention this, you'll end up with a student with all his/her work cut out and NONE of it glued, and then it's lost, and then next time they have to start over! SO this is a good rule of thumb. Most of my students only got as far as getting all the petals cut out.


3rd session: This is our finishing day! I showed and reviewed the color order to double check with students that they had the correct order of the rainbow and we talked about ROY-G-BIV and explained that. I had 4 stations. Gray paper square station, grass stations (forks with green paint), and butterfly station. We have yogurt cups and I said to trace the bottom of it on the gray paper to get a perfect circle for the flower center and glue on. Next green painted paper scraps for the stem and leaf. Next station, butterflies. I just cut pieces of left over tissue paper into about 3 inch squares and showed the students to twist in the center and apply large glue dot to paper and attach.  Draw antennae with pencil. Last step, grass station where the students used green paint with forks and rock back and forth to achieve the green grass on the bottom of the paper. Drying rack then take home next time.


Friday, March 2, 2012

Dr. Suess' Lorax and Truffula Trees


1st graders learned about the Lorax and the need to save nature and the Truffula Trees in Dr. Suess' Lorax. I wanted to read the whole book, but, it was very long for one art class to focus, and then to have them refocus on the project, that wasn't super easy in the first place. So I thought of another route. I showed them the book and some illustrations, and then showed a clip that summerized the book and movie. How convenient that the movie was coming out. The students were already excited. I explained the movie was based on the book and carried the same concept of how we need to put greed aside and care about nature and take care of our trees. I actually got this idea from http://www.artprojectsforkids.org/search?q=truffula . How neato!!! I had to do it with my students. I tweaked it a bit, but this is an accurate tutorial.


Students got to pick from the Truffula tree colors: cotton candy pink, bright yellow, bright orange and purple. I had these colors of yarn to make the trees at different tables. I also had fine bristle brushes (from the Dollar General store), 3x4" pieces of cardboard, and scissors. Follow the tutorial in the link listed above.


When students were finished fluffing their Truffula tree, they went to the trunk station. I have bright colored straws to choose 1 for a trunk. Then I had permanent black markers to make Dr. Suess' signature style zig zags as seen in the illustrations in the book. Students then came to Miss Oetken at the hot glue gun station, where I glued their Truffula tree top onto the trunk. Then they went to the last station, the Lorax station to get a copy, color it in with colored pencil , cut out, and use a piece of scotch tape to tape it on top so it looked like the Lorax was holding onto the tree. The students LOVED them. 


Some even  made more art based on the book! I left the book out to look at and read when they were finished. Lots of them were very interested in the story!


Dr. Suess' Fox in Socks drawings & tie-dye socks


2nd graders had some fun with making art based on Dr. Suess' books for his upcoming birthday! First Miss Oetken read the tongue twisting book, Fox in Socks. The students laughed and laughed.  Then I showed them how to make Dr. Suess's illustration of Fox in Socks. I broke it into several easy steps. I even demonstrated it again in enlarged form on the white board. I told the students to draw with pencil lightly so you can erase easier. Then trace over with bold outline with black crayon or marker. Then color in with oil pastel on your orange paper. Have fun making it your own by choosing the colors of socks and whimsical grass. They all did AMAZING. While students were working on this project. I called table by table back to rubberband their socks, while they wrote their name and classcode in permanent marker on a freezer ziplock baggie. I was waiting by the sink with premixed black and orange RIT dye (Orange and black are the school's colors. These are great colors because students can wear them for Dr. Suess's birthday, spirit days, and support their school at sporting events). While the student would hold open the baggie, I would take the rubber banded socks under the water quickly to wet them, then squirt dye on them in the sink, and then quickly pop them back into the students baggie and zip and place on their shelf. Over the weekend I came in and took off the rubber bands, rinsed, and stapled washing machine directions on the baggies and zipped them back up to deliver to the classrooms. Students were VERY excited! How fun. Even the teachers commented on how they loved that I was tying in literacy and tying it back to theme they were studying in the classroom. They put it in their newsletter and told the students they could wear their socks on Dr. Suess's birthday if they wanted to!


Thursday, January 5, 2012

"A Color Of His Own" 3-D Chameleons!


 2nd graders are making 3-D chameleons! I read the book "A Color Of His Own" using YouTube projected on my white board. It's life changing to have the projector in your room, ask anyone. All of sudden, everyone can see exactly what you see and you don't have students struggling to see the pages when you read a smaller book! Here is a link to the story (I just muted it and read it aloud) http://www.youtube.com/watch?v=vrE1LJjM8gI . We discussed the story and talked about how it was a story of find what colors really express how you feel and who you are.


First things first, we talk about where to put your name and discussed why. We decided on the MIDDLE of the paper on the back. That way, when we cut it out or it falls on the floor, the name will still be on the chameleon. We reviewed on how to use watercolor properly, but most students are almost experts now. We talked about symmetry and what it is. I explained how it's a mirror image and how how when you fold a piece of paper, what you cut on one side, will appear the exact mirror image on the other side when you open it it up. Think of a butterfly or of how you cut a snowflake and then unfold! That is how this project works for the Chameleon. We'll paint today, let it dry, then fold on the dotted line, then cut on the bold one, unfold and glue down the legs. (I'm going to tell them to pick their favorite tail and then cut off the other one, but that's for next time!:) )


Now keep in mind we are using copy paper for this-which means it is prone to tearing. While explaining how to paint and blend I said, keep it away from the edge and showed them my example that was dry and how there was a white boarder. I asked "Why do you think it's important to keep a nice white edge and not paint it?" Students guessed right. It's so that you don't end up tearing the paper (since it's so saturated) when lifting it off the table. It seems to work well and a good rule of thumb. I did talk about making sure you have paint on the other side though so you don't end up with a completely white chameleon. Next time when it's dry, they'll cut out, glue on googly eyes, and glue down just the tip of the feet to a piece of paper of their choice.


chameleon symmetry template


When students were finished I showed them a color wheel study where they needed to color in with crayon or colored pencil, the corresponding colors. We looked at the color wheels in my room for help. On the back was a color wheel with to tertiary colors (blue green, yellow orange..etc.) to color in. This keeps the color wheel fresh in their minds! Then a fun color vocabulary wordsearch if finished early!


Wednesday, November 16, 2011

Mouse Paint! Primary colors and color mixing


Kindergarten has been learning about colors and other elements of art. We have talked about the primaries but now we're moving on to secondary colors and how they're made! We read the book "Mouse Paint" that tells a "tail" of how 3 mice do some color mixing of their own and learn how from the primary colors (blue, yellow, and red) new colors such purple, green and orange are made. What a great book to show and explain color mixing! We had fun and use some old, boring brush---we used FINGERPAINT to do our mixing!!


I got smart about finger paint. I bought these inexpensive squirt bottles from Wal-mart. Then I wrote the names on the papers and squirted a little dot of each color. Then students mixed inbetween colors to make the secondaries! Then when dry, made copies of the mice for students to cut out and glue down!


Wednesday, October 26, 2011

Waving Monsters


I love this ryhming book that's all about cute and hilarious monsters called "Monster Munchies". The students roar with laughter and the pictures are great for inspiration for monster drawing since there are such a wide variety of color and different types of monsters. After the book I showed students how to make a "waving monster". First make a fist. Put the fist near the edge of your paper (hot dog style position of paper) and trace around with a crayon. Lift up and you'll see you have a "paw" or arm waving. Then draw a large wavy oval around the whole paper to create the monster. Fury? Slimy? Hairy? How many eyes does it have? Does it have eye lashes? Eye brows? Mouth? Teeth? Is it mean? A girl or boy? Legs? More arms? Give it some line and pattern. Color it in with bright crayons!


Tuesday, October 25, 2011

Don't Let the Pigeon Drive the Bus!


Vroom Vroom, Pigeon at the wheel!

 I absolutely love the Mo Willems pigeon series. They are hilarious, easy reads, make kids laugh, but also learn. Don't Let the Pigeon Drive the Bus imitates what children act like when they want something really bad. They pry, beg, and say just about anything hoping you'll grant their only wish! This books helps kids relate and laugh. He's begging to drive this bus that the bus driver left and he asks his audience, Can you watch my bus? Oh, and don't let the pigeon drive the bus!


We brainstormed what else could the pigeon dive? Different modes of transportation! We raised our hands and went around and came up with a huge list of different ideas. I made the hand out above. First color in the pigeon with the steering wheel. Then cut out. Glue your pigeon in the middle of the paper. Use a pencil to draw what the pigeon will drive. Color in with crayon! Where is the pigeon? Does it need a sky? Is it driving on the road? Trees? Is it a monster truck? WHere are the cars it's driving over?


just a pigeon driving down the road on a sunny day


Watch out! Pigeon driving a semi on the road!

pigeon driving a bus

deep sea diving in a summarine!